Building a 30 inch telescope
Larry Sayre and I had 30 inch blanks cut from opposite corners of a 40 x 60
Pyrex slab. Pyrex is sold mostly for it's thermal properties as furnace windows
- not necessarily for telescopes. Cincinnati Gasket is one of the general
purpose shops that processes commercial glass to order. They can bandsaw any
thickness slab of fused silica from 2 foot blocks, or CNC waterjet cut disks
of Pyrex as they did ours. We ordered two 30 inch by "thick as possible"
disks with Blanchard grinding on one face and "Blanchard to the lip" on the
other. We paid cash and picked them up in wood crates in my minivan
two weeks later.
Once we got them home, we checked for strain with crossed polarizers and found
no strain except for where it was being supported and a couple of 2cm spots around inclusions.
So far so good.
I then started building a mirror grinder/polisher in my basement while Larry started
walking the barrel. I found a place in town that sold 50 pound bags of 36 grit
Silicon Carbide for the funeral monument trade.
50 pounds was enough to hog a 30" f4 (Larry) and f4.5 (My) blank.
We split a bulk order of abrasives, pitch, and CerOx from Salem.
I hogged the curve using the machine, an edge-on tile tool, and a 25 pound
barbell weight in a couple of weeks of evenings. The process yields a couple of
gallons of glass/broken-grit sludge and many muck-saturated newspapers.
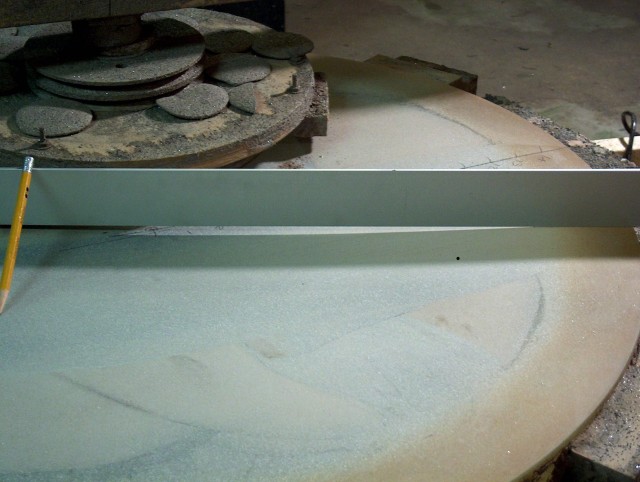
I tracked progress using a dial caliper and straightedge with a spreadsheet
to calculate the profile and volume left to be removed.
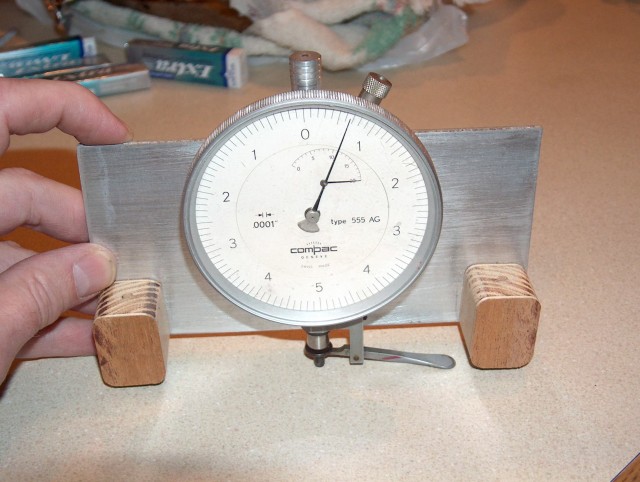
A spherometer gave a good reality check on the sagitta measurements, and
identified high zones.
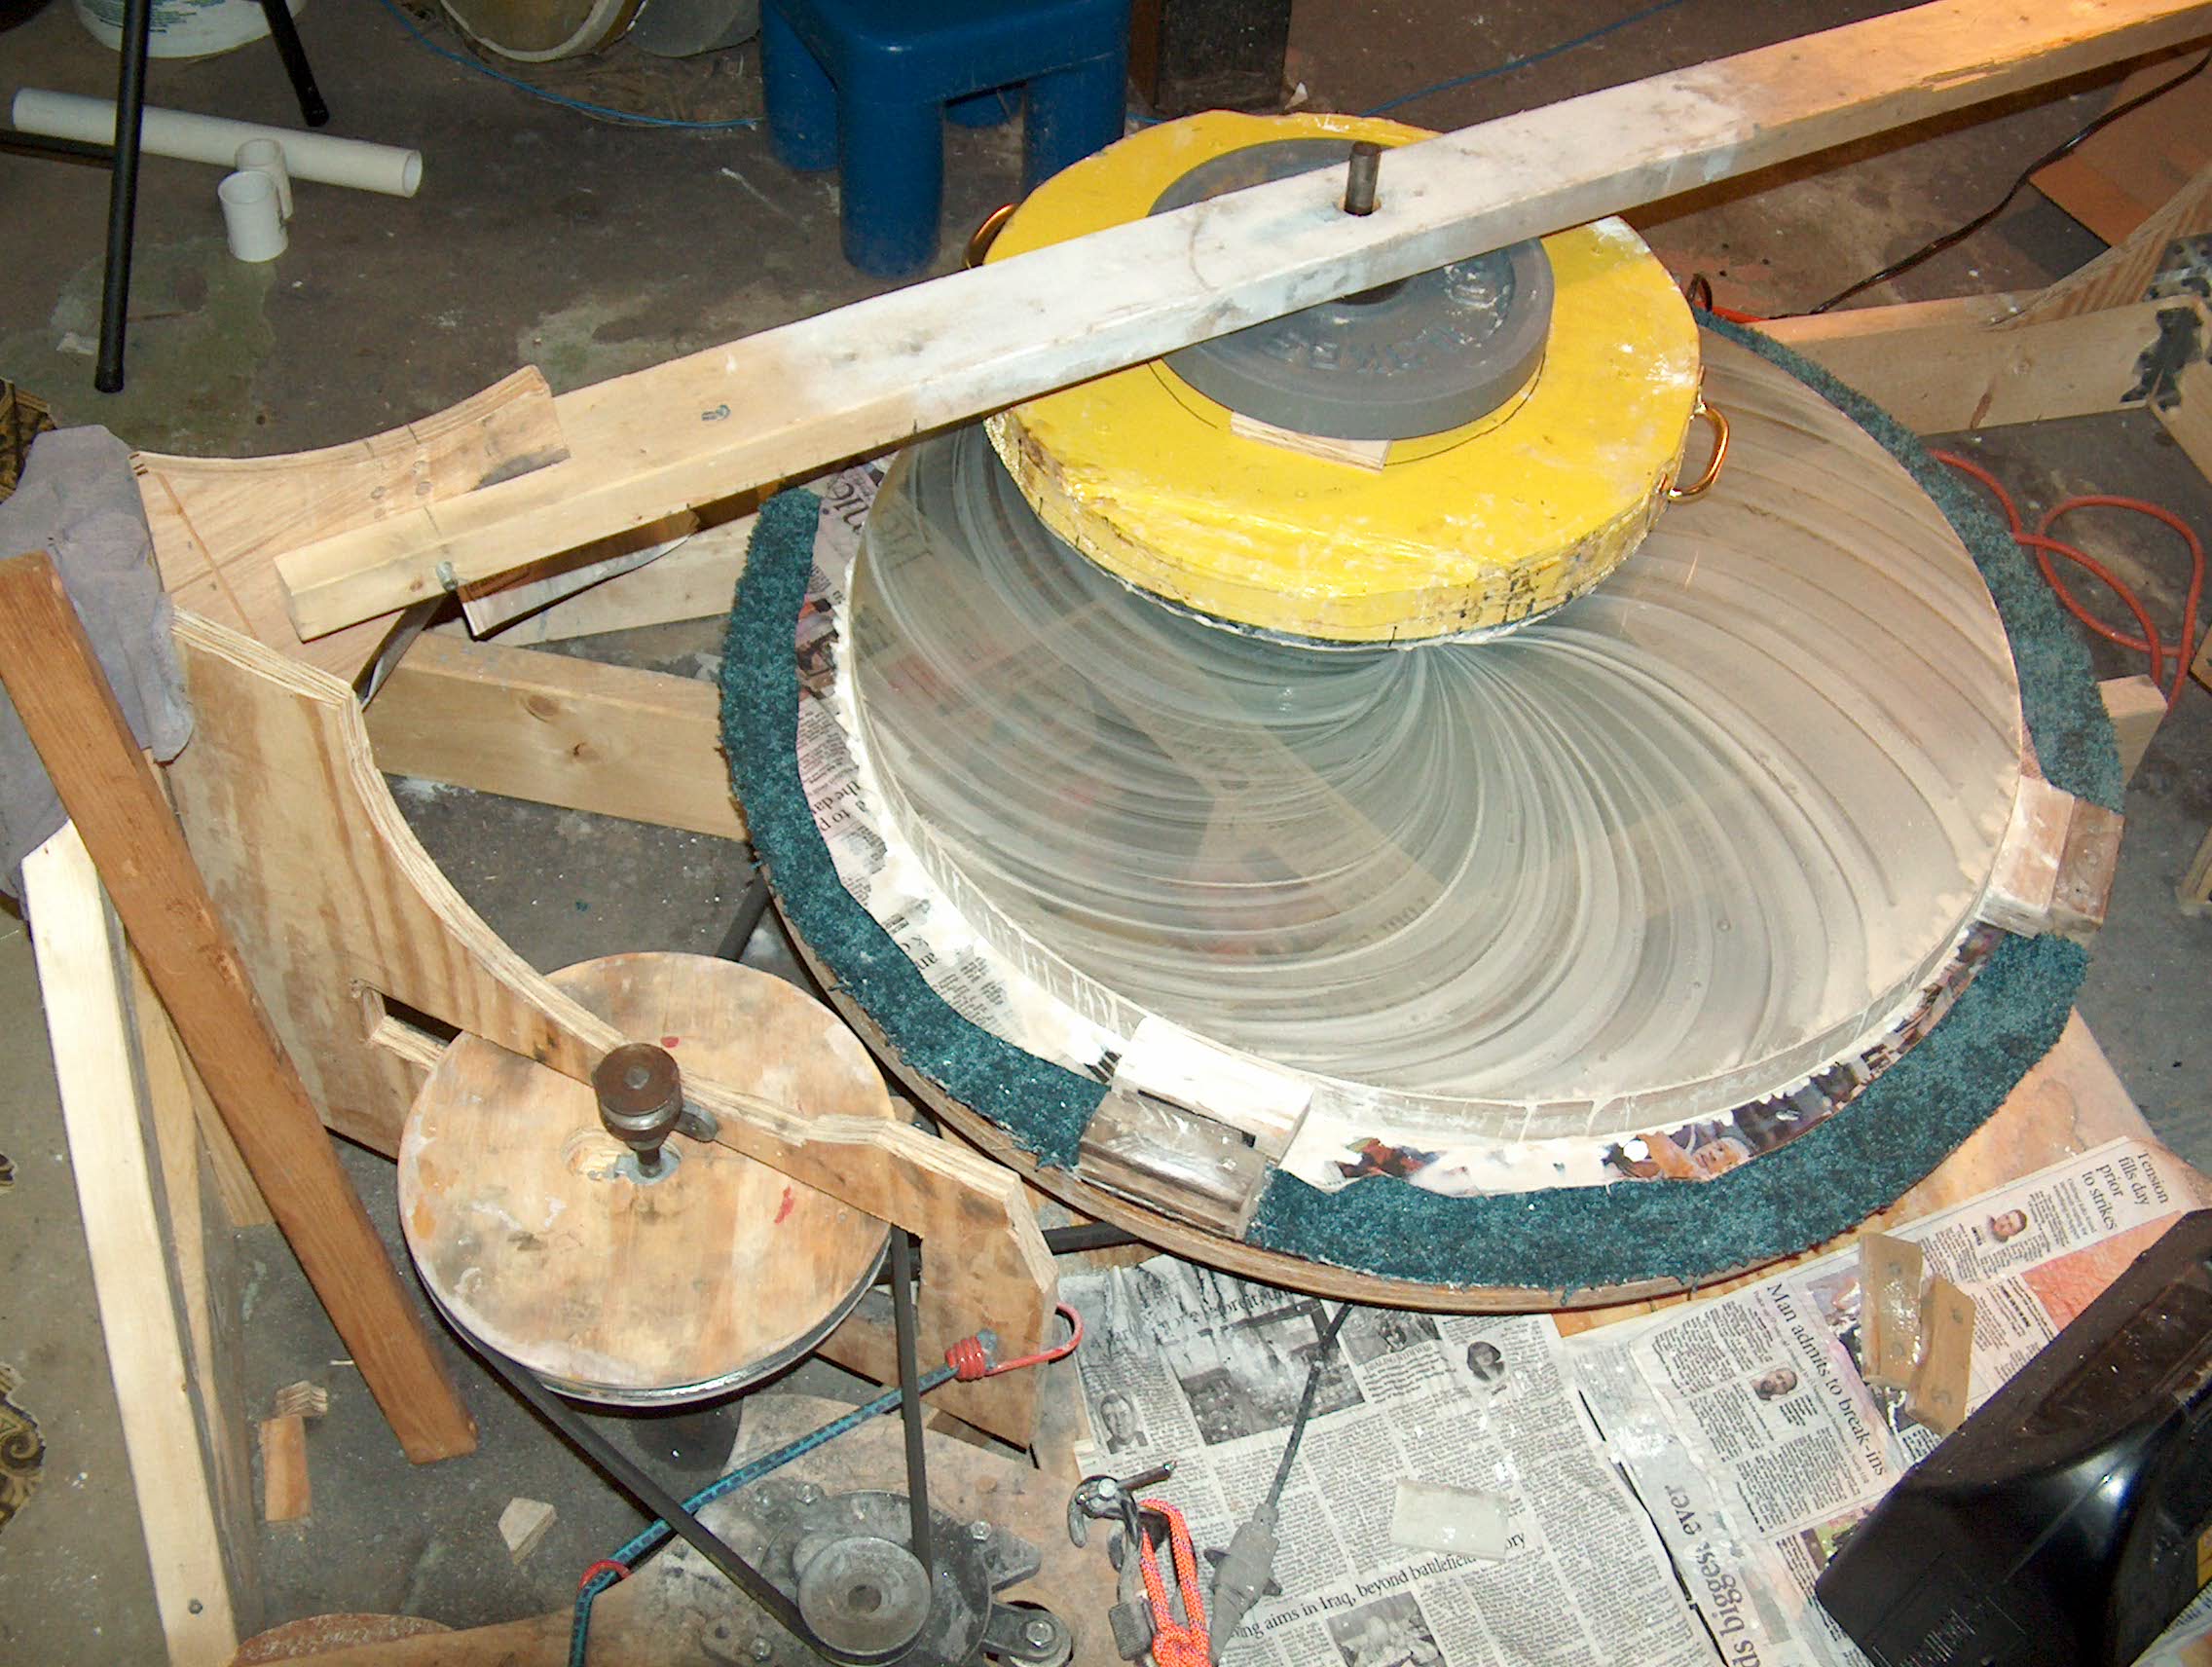
My machine was designed around a 36" turntable made from 2 disks of 3/4" plywood
and a masonite top glued and clamped with every C-clamp I owned plus a tower of
blocks, cement bags and such in the center. I used a bronze bushing in the
center to fit a 1" steel shaft. The frame was 2x8 timbers with crossbraces that
met in the center to capture and reinforce the pivot shaft.
The turntable assembly rested on rubber casters facing up.
 Click for 5 Mb mpg of the machine doing fine grinding
I routered a 32" plywood disk and made a jig to route into the edge with a
V-bit to make a pulley. Titebond aliphatic resin glue applied with a finger
keeps it from splintering and makes a good friction surface for the belt.
It was amusing buying the V-belt. I went to a lawn and garden tractor repair place
and asked for the biggest V-belt they had. "What's it for ?" ...
"Don't care just so it's at least this big..."
Click for 3 Mb mpg of the machine doing fixed radius polishing
The 32" pulley rides on the casters with a friction fit to the underside of the
turntable. I mounted the Xerox machine gearmotor to drive the turntable through
an additional pair of stepdown pulleys, then did the same for the overarm motor.
My fixed motor RPMs and pulley reductions give 2.5 RPM for the turntable
and 4 RPM for the overarm drive.
The machine is adjusted by choosing the hole for the lap pin on the overarm,
screwing the overarm drive pin @ the desired radius on the pulley, and usings
small clamps to set the overarm drive link length. Obviously, metal knobs and
adjustable slides would be easier to adjust, but this works well enough for now.
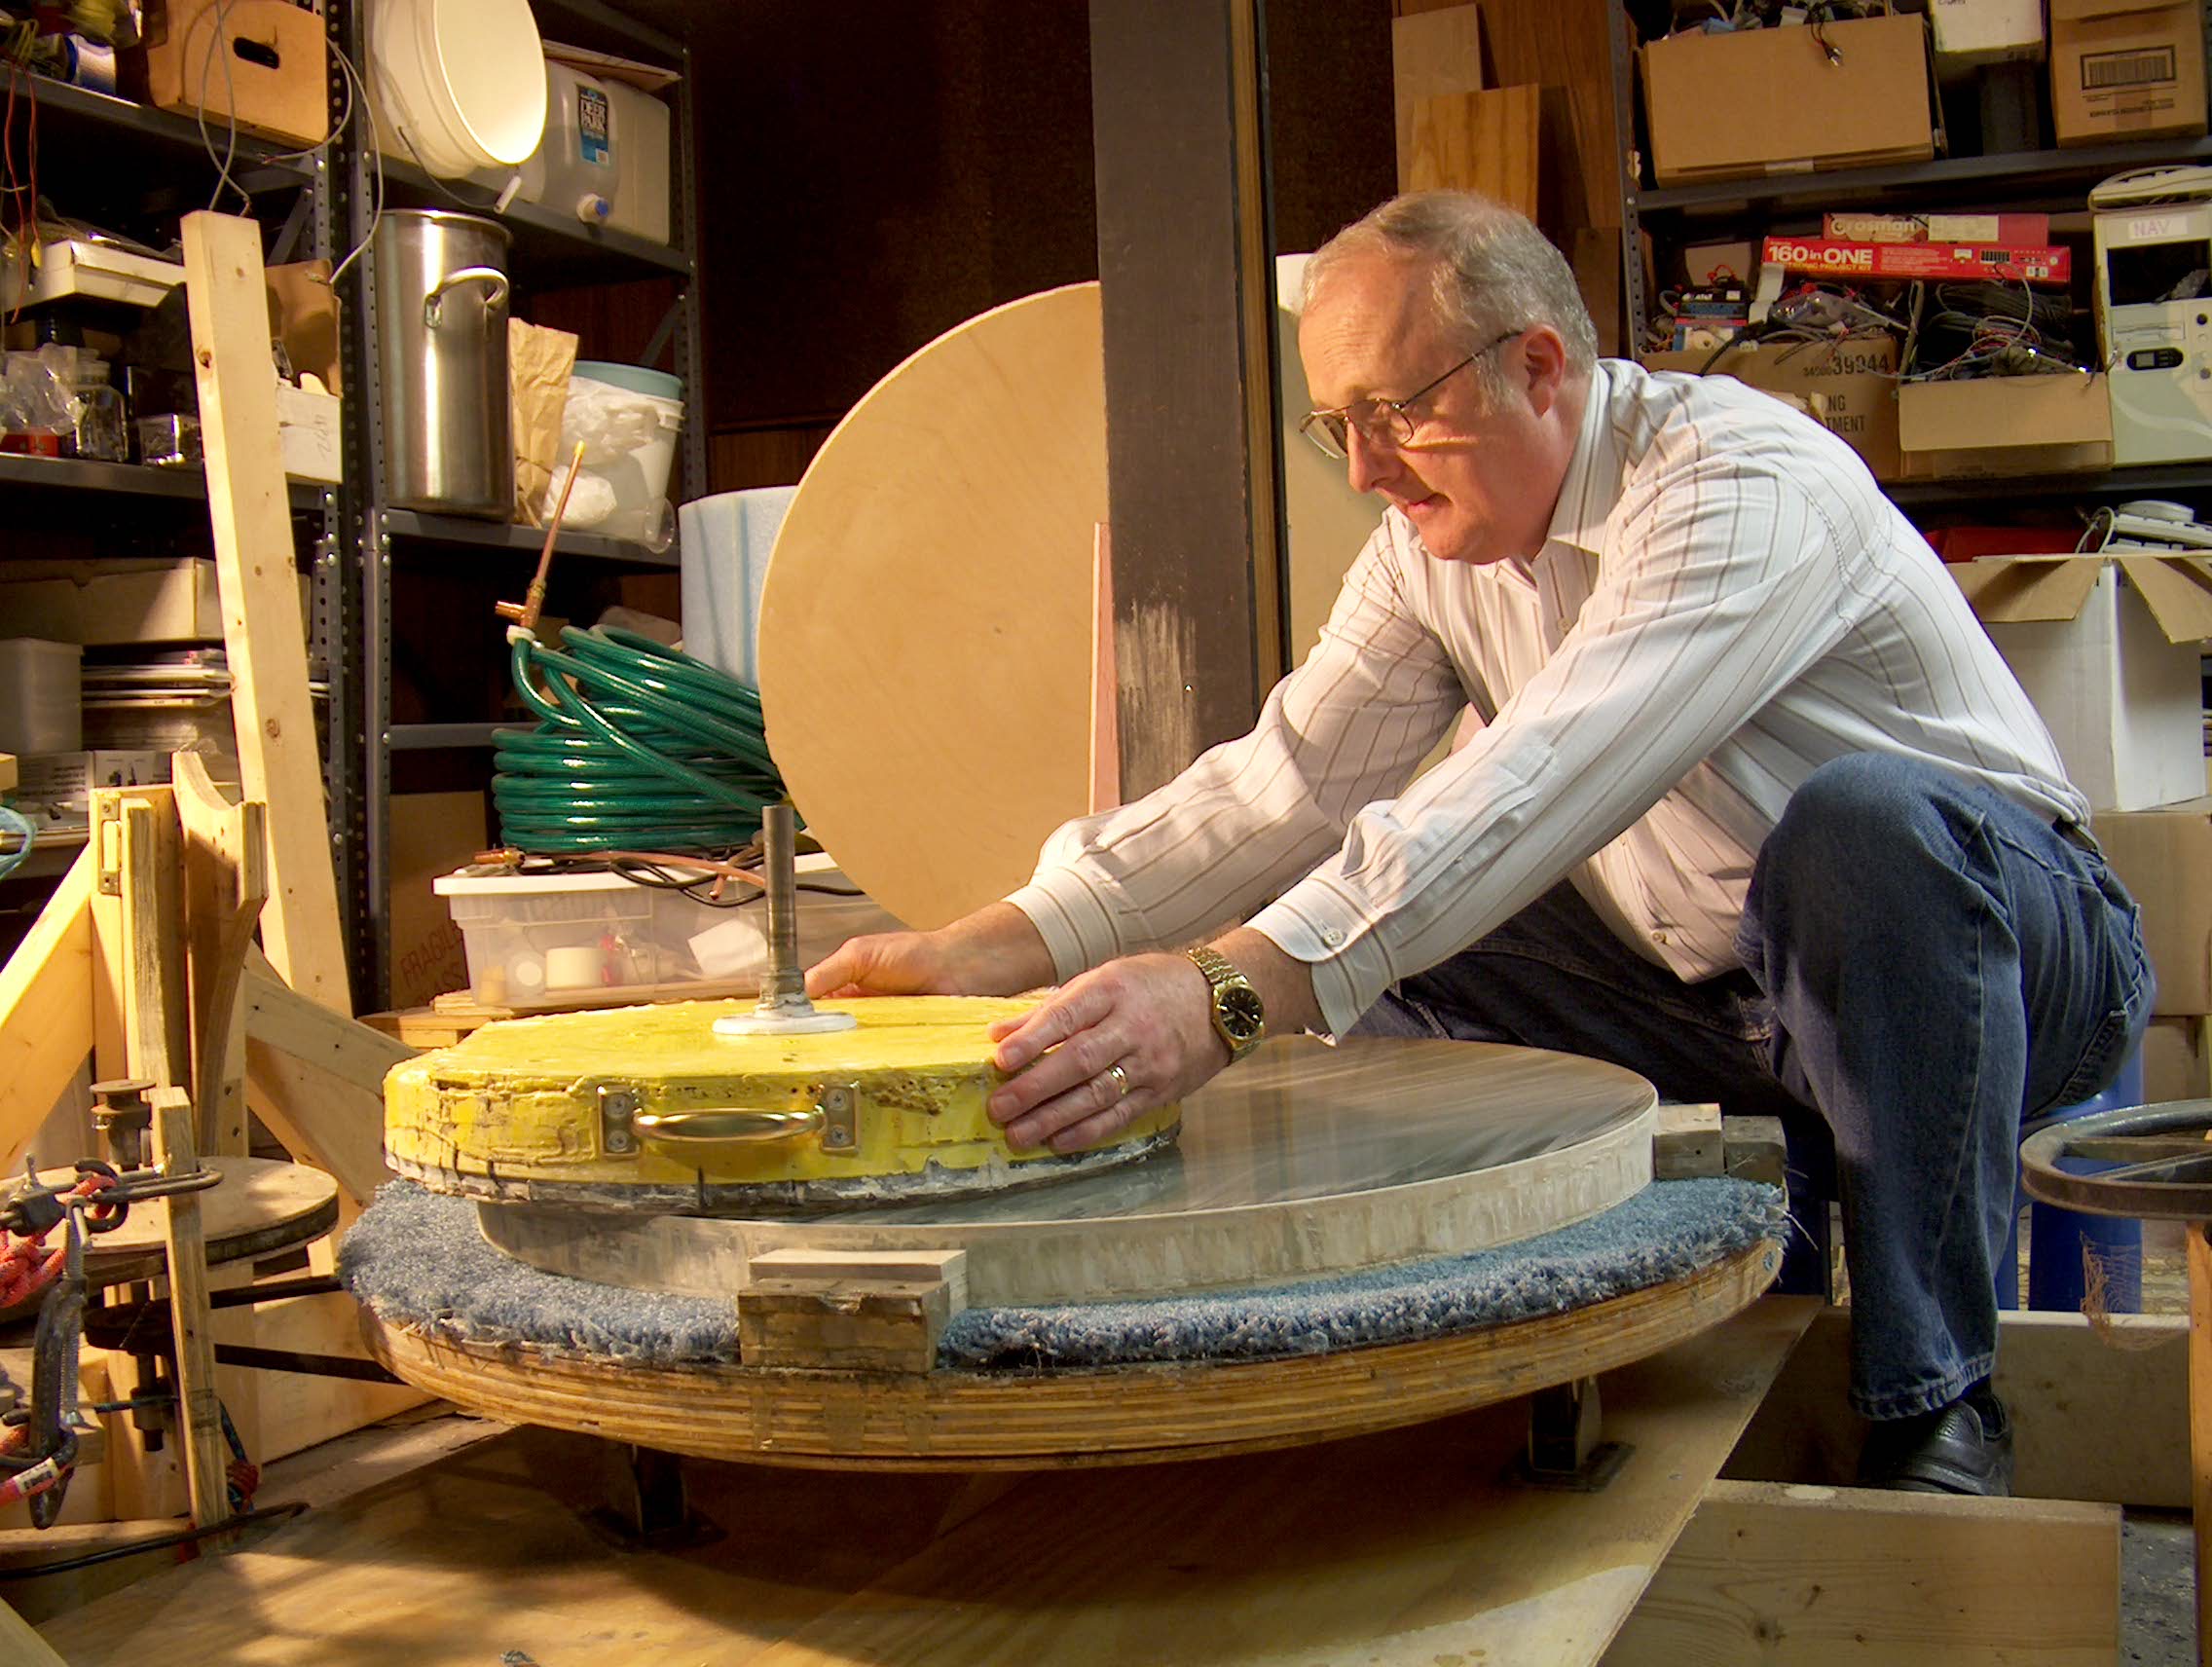
The motors never strain, and seem to have no problem with pushing a weighted
19" pitch lap a lot faster than I could manage by hand.
The machine has polished out two 30" Pyrex, a 16" plate glass, and a 12.5"
zerodur blank so far. More speed and stroke adjustment would be helpful for
figuring, but it's been useful to work on big zones. For final figuring,
I push the lap by hand using only the turntable motor.
For the 30" x 1 5/8" thick mirror, I made a 27 point cell.
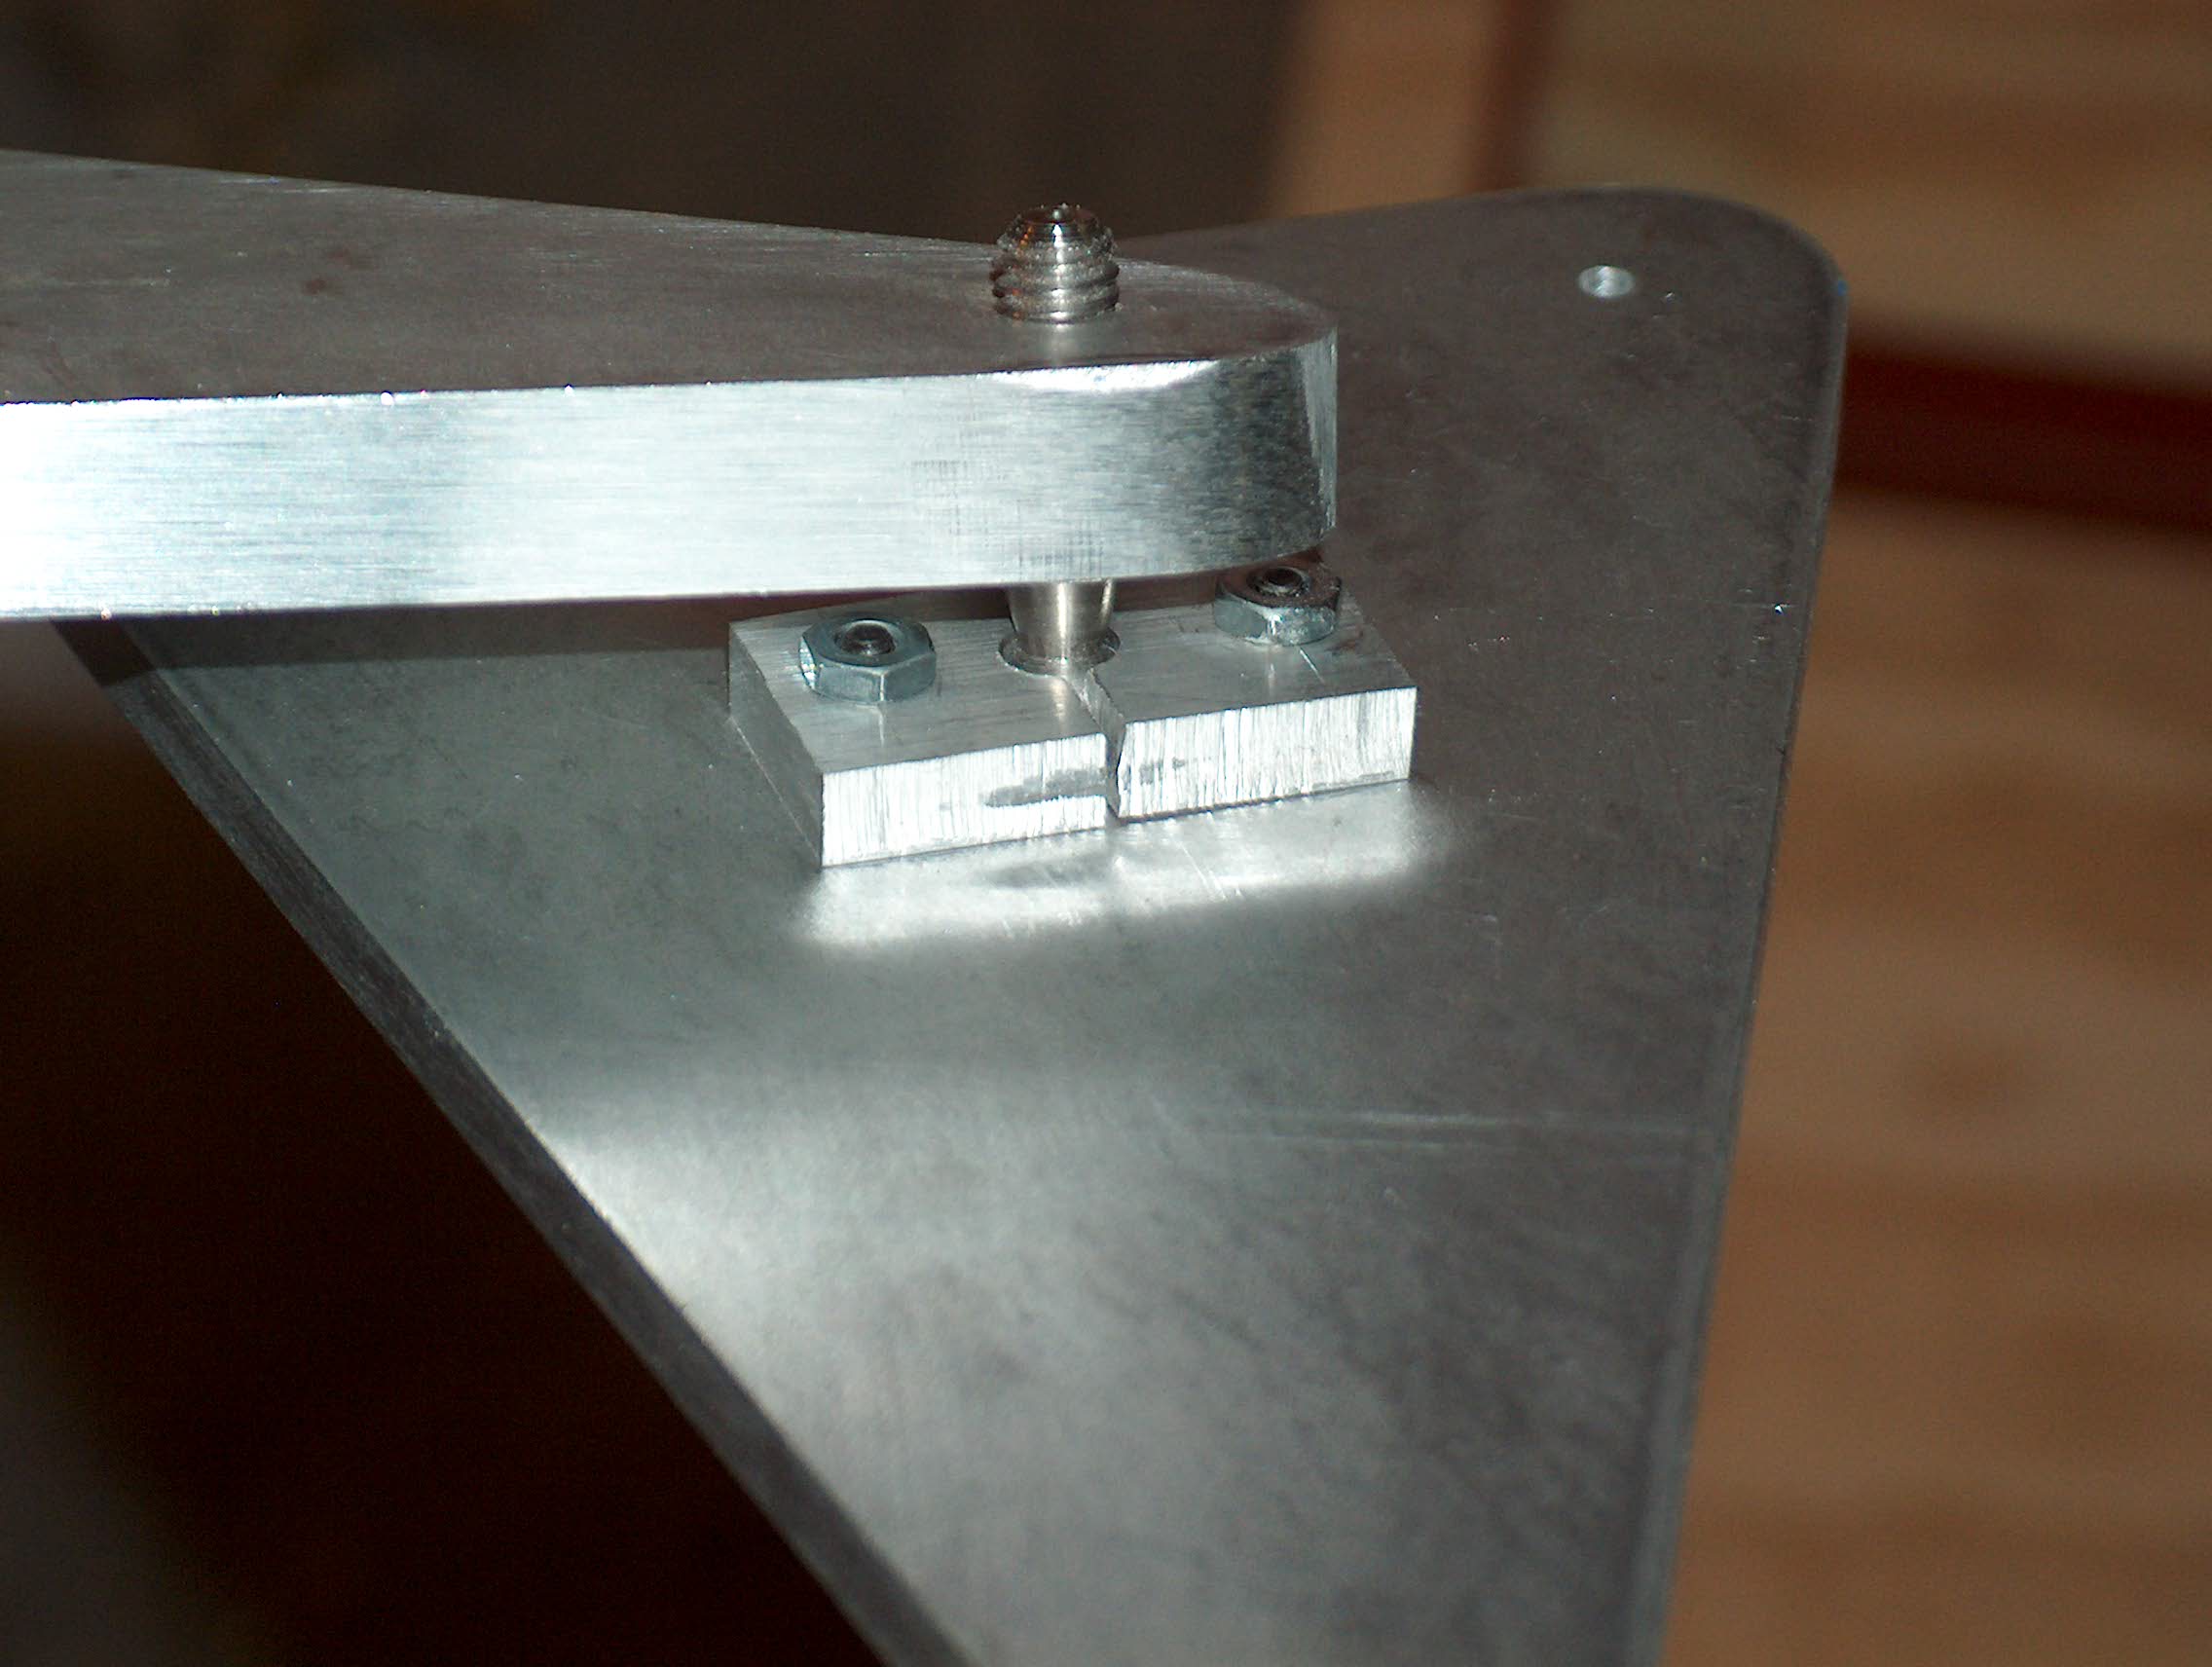
For low friction support of the triangles, I bought stainless ball-end pivots
from McMaster Carr. These had a flat spot on the ends which I filed smooth
using a drill press. I drilled holes 80% through the thick triangles then lined
them with teflon inserts. I made these using the drill press to cut conical
dimples in 3/16" teflon sheet, then popped them out with a hole punch and
ball-peen hammer. They flop around nicely, with no noticeable friction.
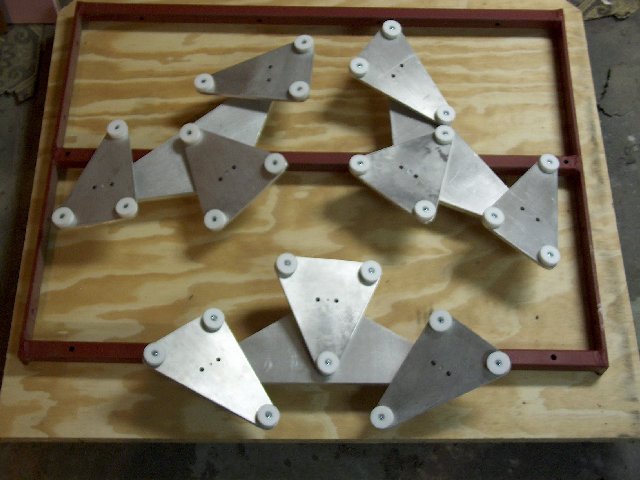
I cut the white mirror contact pads from a plastic cutting board using a hole
saw, keeping the resulting donuts.
The next steps are to complete three threaded ball-end collimation posts, make
astatic edge supports, and cast nine small and three large lead counterweights
for the cell triangles. When properly balanced, the cell triangles should not
tip forward when the cell is tipped forward. It will be a heavy cell, but it
should help balance the OTA.